It’s scary and it’s daunting, but it really doesn’t need to be. Getting your podcast on all those different apps is actually fairly straightforward.
In this guide, we’ll go through how to submit to the biggest platforms. There are dozens more, but once you’ve cracked a few, you’ll be able to figure it out from there, trust me!
**This is a living document – we’ve started with instructions for a couple of platforms and will add more over time. Is there a specific platform you’re looking to get onto? Contact us and we’ll add that one on next.**
First things first
We need to start by going back a step, because before you can get your show onto the apps, you first need to have your podcast hosting platform set-up.
If that sounds a bit alien to you, I’ll explain. Your hosting platform is where your audio files will live – so where you will upload your episodes once they’re done. In the same way that you need a ‘host’ for your website, you need a ‘host’ for your podcast.
This might seem like a layer of complication that isn’t needed, but it’s actually the opposite. Let’s consider all those different places people listen to episodes: Spotify, Apple Podcasts (sometimes still called iTunes, but it’s the same thing), Pocketcasts, Goodpods… the list goes on.
If you had to separately upload every podcast episode to each of these places, it would take you ages.
Your hosting platform means you only need to do it once, and then it’ll magically show up on all of them.
You see what your host does is create you an RSS feed, which will look a little bit like a website address. This is your magic link when it comes to distributing your podcast. With it, you can tell all the different apps your show exists. And once you’ve told them, that’s it. They will automatically see your new episodes and make them available to listeners.
Your podcast host will also give you a ton of extra stuff too, like your listener stats, some marketing and promotional tools, and provide other ways people can hear your show.
There are absolutely tons of hosting platforms out there. You might have heard of Podbean or Libsyn, for example.
Buzzsprout and Anchor are popular choices, because they’re free, but with some limitations.
Some other hosts start you on a free tier and then as you store up more episodes, will start to push you up their paid levels.
My one and only recommendation for a hosting platform is, quite simply, the one I use myself: Captivate.fm. It just works, and has so many features that if I listed them, this blog would probably be out of date within a few days because they will have launched some new bits.
What I think is great about Captivate is that the account is for you as a person – not your show. So if you really take to podcasting and decide to launch a second one, it doesn’t cost any more – it just shares your download allowance.
Anyway, back to the matter in hand. First you need to sign up to a podcast hosting company, create your show and fill in all your settings. You’ll also need a couple of other things.
Firstly, Podcast Cover Art – this is the square image that you’ll see alongside every podcast.
And secondly, you need one piece of audio uploaded. This could be your first episode if it’s ready, but a much better plan would be to create a trailer for your podcast and upload that. Your trailer only needs to be around 90 seconds, a couple of minutes max. I’d also suggest not talking about the podcast ‘coming soon’ as that dates it – if you keep it generic then it can continue to be a promotional tool even after you’ve launched.
So, you have all settings complete, your cover art and trailer uploaded and published. Your host should make it really clear what your RSS feed address is. It might be called your feed link or something a little bit different, but make sure you find and copy this.
Now, you’re ready to get onto the apps.
Some hosting platforms will help with this bit – in fact, some of them integrate with the platforms directly, meaning you can submit in just the click of a button. Spotify for example tends to do this, but I’ll also show you the long hand way of doing it just in case.
Apple Podcasts
Just to repeat from earlier – if you hear someone talk about iTunes, it isn’t a different thing to Apple Podcasts. They are one and the same.
So this is probably the most important platform to get onto. Apple Podcasts still accounts for a huge amount of listening, but it’s actually a bit more than that. There are lots of smaller, less well-known apps which you don’t have to contact directly to get onto, because they basically piggyback Apple Podcasts. They’re able to tap into the database.
So once you’re on Apple Podcasts, you’ll start seeing yourself popping up on apps you didn’t even know existed. It all happens automatically, but it re-enforces the importance of getting this one sorted, so it’s worth doing first.
Sadly, it’s also probably the most complicated, and the one where you’re perhaps most likely to hit a barrier.
You’ll need an Apple ID. If you have an iPhone, iPad, or Mac, you’ll already have this set up.
Head to https://podcastsconnect.apple.com/ and you’ll see a log on screen. You’ll see there’s an option here to create an Apple ID if you need to.
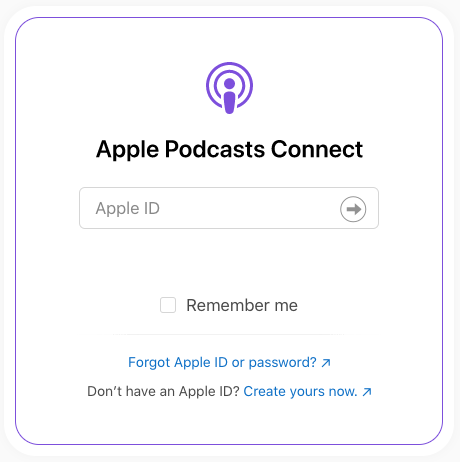
Pop your username and password in. A quick tip here – if you can’t remember your password (not many people ever can!), you’re able to change it on your iPhone or iPad without going through the full reset process. Go to settings, tap your name, tap ‘Password & Security’ and then ‘Change password’. Because you’re already logged into your device, it’s a much quicker way of popping in a new password.
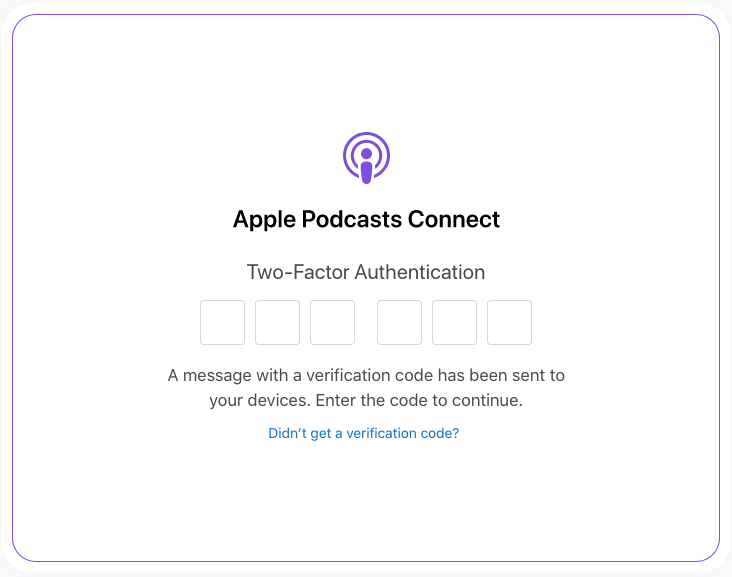
Next you’ll probably have to go through 2-factor authentication and put in the code sent to your device, or answer a couple of memorable questions.
Then, you’ll be in. Chances are, you’ll have to read and agree to some T&Cs before you can go any further. But eventually you’ll be into your Apple Podcasts Connect dashboard.
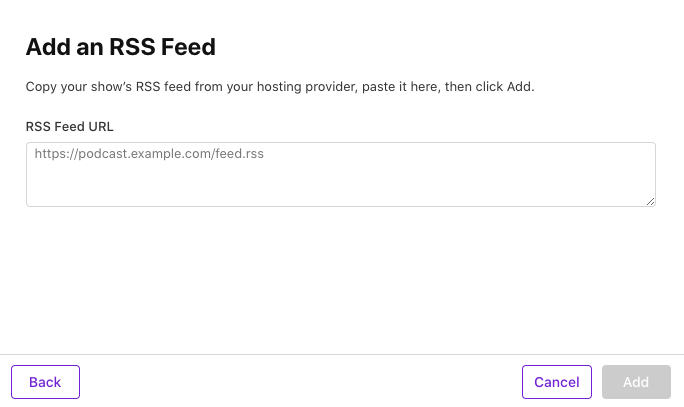
Next, click the little + icon towards the top left of your screen and select ‘New show’. Then select to add a show with an RSS feed. This is where the link you copied from your hosting platform earlier comes into play – just paste it into this box and click add. You’ll need to complete the content rights and add your contact information in, too.
Now, there’s a bit of a waiting game. It usually takes a few minutes to import all your information. Hold tight, go make a cuppa, feed the dog, take a quick shower. Not simultaneously.
Give it a refresh and magically all your information will show up. Check everything and fill in any missing bits.
Once everything is ship shape, hit ‘Save’ first and then ‘Submit for Review’. And that’s it. Now, another waiting game. Hopefully it’ll tell you straight away that your podcast is approved. But if you rush off to your Apple Podcasts app, you won’t find yourself. It’ll take somewhere around 24 hours for your show to index and start showing up. This is normal, nothing to worry about.
It then takes a few days more for the other ‘piggyback’ apps to find you and again that’s normal.
This is a one-time process – once you’re approved, that’s it. You don’t need to do this every time you publish an episode, don’t worry.
Having read this, you might better understand why it’s useful to create a trailer rather than doing it with your first episode. It takes a bit of time, and chances are you’ll want Episode One to come out on a very specific day. Go through all the approval stuff way in advance, with a trailer, and it doesn’t really matter if it takes a while. Once it’s done, you can then plan to launch on a specific day without any worries.
Spotify
The other really big player in the podcast listening world. Spotify has been a real challenger to Apple Podcasts in recent years and has gone in hard to try to win the podcast battle.
You definitely want your show to be on here. Spotify is just Spotify by the way – there are no secondary apps which piggyback this one.
Earlier on, I mentioned that a lot of hosting platforms integrate directly with Spotify. If yours does, then it’s best to follow their process and instructions to do it that way.
But if not, this is what you need to do. Thankfully it’s a bit easier than Apple.
First, you need a Spotify account. I’m guessing you already have one but if not get it done – just a free one is fine.
Then head to https://podcasters.spotify.com/ and log in. You might need to accept some T&Cs or complete some settings the first time you log in.
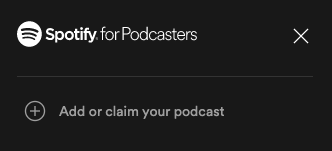
Once you’re into your dashboard, you want to click the three dots right in the top left corner of the screen. There you will see a link to ‘Add or claim your podcast’ (ignore the claim bit by the way, that’s more for really old shows).
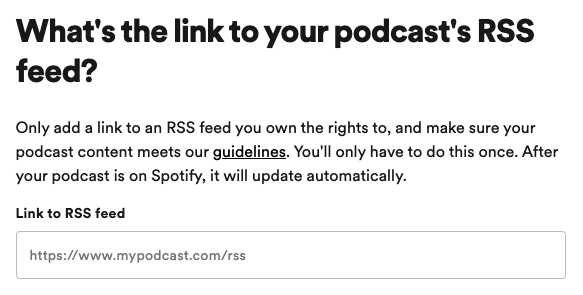
Next click ‘get started’ and again you’ll be presented with a little box where you need to paste your RSS feed. Click ‘next’ and it’ll then guide you through checking everything.
You might need to email a code to yourself just to prove it really is your podcast. This is normal and just makes sure no-one else can find your RSS feed and nick ownership of your show.
Finally go through the ‘Review and submit’ process and job’s a good ‘un. Spotify tends to list new podcasts quicker than Apple, but you still might find it takes a day or two to turn up in search results in the way you’d expect it to.